Embrace the future of dental care with RevenueWell PBHS Secure Video – Your all-in-one solution for elevating patient experiences, ensuring compliance, and optimizing practice efficiency. Join the telehealth revolution and provide unparalleled virtual care to your patients!
- 1. Open a web browser
2. In the TOP address bar type the Secure Video URL and select the ENTER key located on your keyboard.
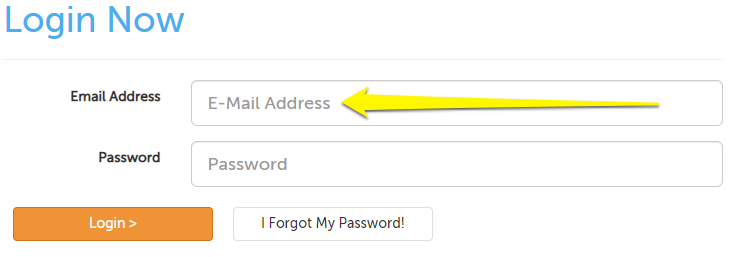
3. Enter your email address (used as your username) into the Email Address text field.
4. Enter your password into the Password text field.
5. Select the Login button.

- 1. Once you login.
2.From the Video Conference Dashboard, select the New Scheduled Session button.
3. Select the Date and Time (AM/PM) from the drop down.
4. Now select the Go button, you will be taken to the Add Participant Screen.
5. Add your participant details.
6. Now select the Save button to schedule your Videoconference.
7. This will bring you back to your Videoconference Dashboard. Here you can see any scheduled sessions.
8. To begin your meeting on the scheduled date and time, select the Enter Meeting button.
- 1. Login and open the Video Conference Dashboard
2. Select the New Session Now button.
3. Add participant details, select invitation preferences, set payment requirements, and schedule the Video Conference.
4. Find the scheduled session on the dashboard, then select Enter Meeting to begin.
- 1. Once a Secure Video session is created for a participant, they will receive an Email or Text Message Invitation.
2. Participants can access the Secure Video Portal by:
- Clicking the Yes or No for RSVP OR Join Session button in the Email Invitation.
- Clicking the URL provided in the Text Message Invitation.
1. Participants can confirm attendance by selecting Yes or No in the Invitation Email.
2. For text message invitations, participants can reply with Y (yes) or N (no).
3. The Secure Video system will send a confirmation back.
4. Change RSVP status on the Secure Video Portal by clicking the RSVP Mail button.- 1. On the Video Conference Dashboard, find the existing session.
2. Select Add Participant within the session.
3. On the next screen you can add participant details, set invitation preferences, and payment requirements.
4. Save to add the new participant.
5. Repeat steps 2-5 for each additional participant.
- 1. Install Zoom before connecting to Secure Video.
2. If a PAY NOW button is present, complete payment before connecting.
3. On the Secure Video Portal, select the Enter Waiting Room button at the scheduled time.
- 1. If payment is due, participants must pay before the Secure Video session begins.
2. From the Invitation Email, find and select the Pay Now button on the Secure Video portal.
- If invited via email, the email will be auto-entered into the E-Mail Receipt To field.
3. Submit payment information
4. On the payment complete page, select the Go To Dashboard button for confirmation.
- 1. If online forms are required, participants will find a section called Session Documents in the Secure Video Portal by opening their invitation.
2. Select the Submit button next to each document to fill out and sign online.
3. Complete the entire form and select Submit Document to finalize.
4. View submitted forms, download PDFs, or resubmit completed forms as needed.
By following these detailed steps, dental office staff can effectively manage Secure Video sessions for a seamless experience.